Search This Blog

Tuesday, August 14, 2012

Migrate the database files from disk to asm disk

TO Migrate the database files from disk
to asm disk is as follows,
1.configure flash recovery area.
2.Migrate datafiles to ASM.
3.Control file to ASM.
4.Create Temporary tablespace.
5.Migrate Redo logfiles
6.Migrate spfile to ASM.


step 1:Configure flash recovery area.

SQL> connect sys/sys@prod1 as sysdba
Connected.
SQL> alter database disable block change tracking;

Database altered.

SQL> alter system set db_recovery_file_dest_size=500m;

System altered.

SQL> alter system set db_recovery_file_dest=’+RECOVERYDEST’;

System altered


step 2 and 3: Migrate data files and control file
to ASM. 

use RMAN to migrate the data files to ASM disk groups.
All data files will be migrated to the newly created disk group, DATA

SQL> alter system set db_create_file_dest='+DATA';

System altered.

SQL> alter system set control_files='+DATA/ctf1.dbf' scope=spfile;

System altered.

SQL> shu immediate

[oracle@rac1 bin]$ ./rman target /


RMAN> startup nomount

Oracle instance started


RMAN> restore controlfile from '/u01/new/oracle/oradata/mydb/control01.ctl';

Starting restore at 08-DEC-09

allocated channel: ORA_DISK_1

channel ORA_DISK_1: SID=146 device type=DISK

channel ORA_DISK_1: copied control file copy

output file name=+DATA/ctf1.dbf

Finished restore at 08-DEC-09

RMAN> alter database mount;

database mounted

released channel: ORA_DISK_1

RMAN> backup as copy database format '+DATA';
Starting backup at 08-DEC-09

allocated channel: ORA_DISK_1

channel ORA_DISK_1: SID=146 device type=DISK

channel ORA_DISK_1: starting datafile copy

input datafile file number=00001 name=/u01/new/oracle/oradata/mydb/system01.dbf

output file name=+DATA/mydb/datafile/system.257.705063763 tag=TAG20091208T110241 RECID=1 STAMP=705064274

channel ORA_DISK_1: datafile copy complete, elapsed time: 00:08:39

channel ORA_DISK_1: starting datafile copy

input datafile file number=00002 name=/u01/new/oracle/oradata/mydb/sysaux01.dbf

output file name=+DATA/mydb/datafile/sysaux.258.705064283 tag=TAG20091208T110241 RECID=2 STAMP=705064812

channel ORA_DISK_1: datafile copy complete, elapsed time: 00:08:56

channel ORA_DISK_1: starting datafile copy

input datafile file number=00003 name=/u01/new/oracle/oradata/mydb/undotbs01.dbf

output file name=+DATA/mydb/datafile/undotbs1.259.705064821 tag=TAG20091208T110241 RECID=3 STAMP=705064897

channel ORA_DISK_1: datafile copy complete, elapsed time: 00:01:25

channel ORA_DISK_1: starting datafile copy

copying current control file

output file name=+DATA/mydb/controlfile/backup.260.705064907 tag=TAG20091208T110241 RECID=4 STAMP=705064912

channel ORA_DISK_1: datafile copy complete, elapsed time: 00:00:07

channel ORA_DISK_1: starting datafile copy

input datafile file number=00004 name=/u01/new/oracle/oradata/mydb/users01.dbf

output file name=+DATA/mydb/datafile/users.261.705064915 tag=TAG20091208T110241 RECID=5 STAMP=705064915

channel ORA_DISK_1: datafile copy complete, elapsed time: 00:00:03

channel ORA_DISK_1: starting full datafile backup set

channel ORA_DISK_1: specifying datafile(s) in backup set

including current SPFILE in backup set

channel ORA_DISK_1: starting piece 1 at 08-DEC-09

channel ORA_DISK_1: finished piece 1 at 08-DEC-09

piece handle=+DATA/mydb/backupset/2009_12_08/nnsnf0_tag20091208t110241_0.262.705064919 tag=TAG20091208T110241 comment=NONE

channel ORA_DISK_1: backup set complete, elapsed time: 00:00:01

Finished backup at 08-DEC-09

RMAN> switch database to copy;

datafile 1 switched to datafile copy "+DATA/mydb/datafile/system.257.705063763"

datafile 2 switched to datafile copy "+DATA/mydb/datafile/sysaux.258.705064283"

datafile 3 switched to datafile copy "+DATA/mydb/datafile/undotbs1.259.705064821"

datafile 4 switched to datafile copy "+DATA/mydb/datafile/users.261.705064915"

RMAN> alter database open;
database opened

RMAN> exit

Recovery Manager complete.


SQL> conn sys/oracle as sysdba

Connected.

SQL> select tablespace_name,file_name from dba_data_files;

TABLESPACE_NAME                FILE_NAME

------------------------------ ---------------------------------------------

USERS                          +DATA/mydb/datafile/users.261.705064915

UNDOTBS1                       +DATA/mydb/datafile/undotbs1.259.705064821

SYSAUX                         +DATA/mydb/datafile/sysaux.258.705064283

SYSTEM                         +DATA/mydb/datafile/system.257.705063763


SQL> select name from v$controlfile;


NAME
----

+DATA/ctf1.dbf

NO       16384            594

step 4:Migrate temp tablespace to ASM.

SQL> alter tablespace temp add tempfile size 100m;

Tablespace altered.

SQL> select file_name from dba_temp_files;

FILE_NAME

---------------------------------------------

+DATA/mydb/tempfile/temp.263.705065455

otherwise,
Create temporary tablespace in ASM disk group.

SQL> CREATE TABLESPACE temp1 TEMPFILE ‘+diskgroup1’;

SQL> alter database default temporary tablespace temp1;

Database altered.


step 5:Migrate redo logs to ASM.

SQL> select member,group# from v$logfile;

MEMBER                                                 GROUP#

-------------------------------------------------- ----------

/u01/new/oracle/oradata/mydb/redo03.log                     3

/u01/new/oracle/oradata/mydb/redo02.log                     2

/u01/new/oracle/oradata/mydb/redo01.log                     1

SQL> alter database add logfile group 4 size 5m;

Database altered.

SQL> alter database add logfile group 5 size 5m;

Database altered.

SQL> alter database add logfile group 6 size 5m;

Database altered.

SQL> select member,group# from v$logfile;

MEMBER                                                 GROUP#

-------------------------------------------------- ----------

/u01/new/oracle/oradata/mydb/redo03.log                     3

/u01/new/oracle/oradata/mydb/redo02.log                     2

/u01/new/oracle/oradata/mydb/redo01.log                     1

+DATA/mydb/onlinelog/group_4.264.705065691                  4

+DATA/mydb/onlinelog/group_5.265.705065703                  5

+DATA/mydb/onlinelog/group_6.266.705065719                  6

SQL> alter system switch logfile;

System altered.

SQL> alter database drop logfile group 2;

Database altered.

SQL> alter database drop logfile group 3;

Database altered.

SQL> alter database drop logfile group 4;

Database altered.

SQL> alter database drop logfile group 1;

Database altered.
Add additional control file.
If an additional control file is required for redundancy,
you can create it in ASM as you would on any other filesystem.
SQL> connect sys/sys@prod1 as sysdba
Connected to an idle instance.
SQL> startup mount
ORACLE instance started.

SQL> alter database backup controlfile to '+DATA/cf2.dbf';

Database altered.

SQL> alter system set control_files='+DATA/cf1.dbf '
,'+DATA/cf2.dbf' scope=spfile;

System altered.

SQL> shutdown immediate;
ORA-01109: database not open

Database dismounted.
ORACLE instance shut down.
SQL> startup
ORACLE instance started.

SQL> select name from v$controlfile;

NAME
---------------------------------------
+DATA/cf1.dbf
+DATA/cf2.dbf

step 6:Migrate spfile to ASM:

Create a copy of the SPFILE in the ASM disk group.
In this example, the SPFILE for the migrated database will be stored as +DISK/spfile.

If the database is using an SPFILE already, then run these commands:

run {
BACKUP AS BACKUPSET SPFILE;
RESTORE SPFILE TO "+DISK/spfile";
}


If you are not using an SPFILE, then use CREATE SPFILE
from SQL*Plus to create the new SPFILE in ASM.
For example, if your parameter file is called /private/init.ora,
use the following command:

SQL> create spfile='+DISK/spfile' from pfile='/private/init.ora';


After successfully migrating all the data files
over to ASM, the old data files are no longer
needed and can be removed. Your single-instance
database is now running on ASM!
Monday, July 2, 2012

Table Partitioning


Table Partitioning
 

Now a days enterprises run databases of hundred of Gigabytes in size. These databases are known as
Very Large Databases (VLDB). From Oracle Ver. 8.0  Oracle has provided the feature of
table partitioning i.e. you can partition a table according to some criteria . For example you
have a SALES table with the following structure

Suppose this table contains millions of records, but all the records belong to four years only i.e. 1991, 1992, 1993
and 1994.  And most of the time you are concerned about only one year i.e. you give queries like the following

select sum(amt) from sales where year=1991;
select product,sum(amt) from sales where year=1992
          Group by product;
Now whenever you give queries like this Oracle will search the whole table. If you partition this table according to
year, then the performance is improve since oracle will scan only a single partition instead of whole table.


CREATING PARTITION TABLES


To create a partition table give the following statement

create table sales (year number(4),
                    product varchar2(10),
                   amt number(10,2))
     partition by range (year)
     partition p1 values less than (1992) tablespace u1,
     partition p2 values less than (1993) tablespace u2,
     partition p3 values less than (1994) tablespace u3,
     partition p4 values less than (1995) tablespace u4,
   partition p5 values less than (MAXVALUE) tablespace u5;
In the above example sales table is created with 5 partitions. Partition p1 will contain rows of year 1991 and
it will be stored in tablespace u1. Partition p2 will contain rows of year 1992 and it will be stored in tablespace u2.
Similarly p3 and p4.

In the above example if you don’t specify the partition p4 with values less than MAVALUE, then you will not be
able to insert any row with year above 1994.

Although not required, you can place partitions in different tablespaces. If you place partitions in different tablespaces
then you can isolate problems due to failures as only a particular partition will not be available and rest of the
partitions will still be available.

The above example the table is partition by range.

 In Oracle you can partition a table by

  • Range Partitioning
  • Hash Partitioning
  • List Partitioning
  • Composite Partitioning

Range Partitioning


This type of partitioning is useful when dealing with data that has logical ranges into which it can be distributed;
for example, value of year. Performance is best when the data evenly distributes across the range

Hash partitioning


Use hash partitioning if your data does not easily lend itself to range partitioning, but you would like to partition for
performance and manageability reasons. Hash partitioning provides a method of evenly distributing data across a
specified number of partitions. Rows are mapped into partitions based on a hash value of the partitioning key

The following example shows how to  create a hash partition table.
The following example creates a hash-partitioned table. The partitioning column is partno, four partitions are created
and assigned system generated names, and they are placed in four named tablespaces (tab
1,tab2, ...).

CREATE TABLE products
     (partno NUMBER,
      description VARCHAR2 (60))
   PARTITION BY HASH (partno)
   PARTITIONS 4
   STORE IN (tab1, tab2, tab3, tab4);


List Partitioning

 
Use list partitioning when you require explicit control over how rows map to partitions. You can specify a list of discrete 
values for the partitioning column in the description for each partition. This is different from range partitioning, where a 
range of values is associated with a partition, and from hash partitioning, where the user has no control of the row to 
partition mapping.
 
List partitioning allows unordered and unrelated sets of data to be grouped and organized together very naturally
 
The following example creates a table with list partitioning 
 
Create table customers (custcode number(5),
                  Name varchar2(20),
                  Addr varchar2(10,2),
                  City varchar2(20),
                  Bal number(10,2))
     Partition by list (city),
Partition north_India values (‘DELHI’,’CHANDIGARH’),
Partition east_India values (‘KOLKOTA’,’PATNA’),
Partition south_India values (‘HYDERABAD’,’BANGALORE’,
                               ’CHENNAI’),
Partition west India values (‘BOMBAY’,’GOA’);
 
If a row is inserted in the above table then oracle maps the value of city column and whichever partition list matches the 
city column the row is stored in that partition.


COMPOSITE PARTITONING

Composite partitioning partitions data using the range method, and within each partition, subpartitions it using
the hash method. Composite partitions are ideal for both historical data and striping, and provide improved
manageability of range partitioning and data placement, as well as the parallelism advantages of hash partitioning.
When creating composite partitions, you specify the following:
  • Partitioning method: range
  • Partitioning column(s)
  • Partition descriptions identifying partition bounds
  • Subpartitioning method: hash
  • Subpartitioning column(s)
  • Number of subpartitions for each partition or descriptions of subpartitions
The following statement creates a composite-partitioned table. In this example, three range partitions are created, each
containing eight subpartitions. Because the subpartitions are not named, system generated names are assigned, but the

STORE IN
clause distributes them across the 4 specified tablespaces (tab1, ...,tab4).
CREATE TABLE PRODUCTS (partno NUMBER, 
      description VARCHAR(32),
       costprice NUMBER)
  PARTITION BY RANGE (partno)
     SUBPARTITION BY HASH(description)
    SUBPARTITIONS 8 STORE IN (tab1, tab2, tab3, tab4)
      (PARTITION p1 VALUES LESS THAN (100),
       PARTITION p2 VALUES LESS THAN (200),
       PARTITION p3 VALUES LESS THAN (MAXVALUE));


ALTERING PARTITION TABLES

 
To add a partition 
 
You can add add a new partition to the "high" end (the point after the last existing partition). To add a partition 
at the beginning or in the middle of a table, use the SPLIT PARTITION clause.
 
For example to add a partition to sales table give the following command.
 
alter table sales add partition p6 values less than (1996);
 
To add a partition to a Hash Partition table give the following command.
 
Alter table products add partition;
 
Then Oracle adds a new partition whose name is system generated and it is created in the default tablespace. 
To add a partition by user define name and in your specified tablespace give the following command.
 
Alter table products add partition p5 tablespace u5;
 
To add a partition to a List partition table give the following command.
 
alter table customers add partition central_India 
            values (‘BHOPAL’,’NAGPUR’);
Any value in the set of literal values that describe the partition(s) being added must not exist in any of the other partitions
of the table.


Coalescing Partitions

Coalescing partitions is a way of reducing the number of partitions in a hash-partitioned table, or the number of subpartitions in a composite-partitioned table. When a hash partition is coalesced, its contents are redistributed into one or more remaining partitions determined by the hash function. The specific partition that is coalesced is selected by Oracle, and is dropped after its contents have been redistributed.
To coalesce a hash partition give the following statement.
Alter table products coalesce partition;
This reduces by one the number of partitions in the table products.

DROPPING PARTITIONS

To drop a partition from Range Partition table, List Partition or Composite Partition table give the following command.
Alter table sales drop partition p5;
Once you have drop the partition and if you have created a global index on the table. Then you have to rebuild the global index after dropping the partition by giving the following statement.
Alter index sales_ind rebuild;
To avoid rebuilding of indexes after dropping of the partitions you can also first delete all the records and then drop
the partition like this
Delete from sales where year=1994;
Alter table sales drop partition p4;
This method is most appropriate for small tables, or for large tables when the partition being dropped contains a small percentage of the total data in the table.
Another method of dropping partitions is give the following statement.
ALTER TABLE sales DROP PARTITION p5 UPDATE GLOBAL INDEXES;
 
This causes the global index to be updated at the time the partition is dropped.


Exchanging a Range, Hash, or List Partition

To exchange a partition of a range, hash, or list-partitioned table with a nonpartitioned table, or the reverse, use the ALTER TABLE ... EXCHANGE PARTITION statement. An example of converting a partition into a nonpartitioned table follows. In this example, table stocks can be range, hash, or list partitioned.
ALTER TABLE stocks
    EXCHANGE PARTITION p3 WITH stock_table_3;
 

Merging Partitions

Use the ALTER TABLE ... MERGE PARTITIONS statement to merge the contents of two partitions into one partition. Te two original partitions are dropped, as are any corresponding local indexes.
You cannot use this statement for a hash-partitioned table or for hash subpartitions of a composite-partitioned table.
You can only merged two adjacent partitions, you cannot merge non adjacent partitions.
For example the merge the partition p2 and p3 into one partition p23 give the following statement.
Alter table sales merge partition p2 and p3 into
partition p23;

Modifying Partitions: Adding Values

Use the MODIFY PARTITION ... ADD VALUES clause of the ALTER TABLE statement to extend the value list of an existing partition. Literal values being added must not have been included in any other partition's value list. The partition value list for any corresponding local index partition is correspondingly extended, and any global index, or global or local index partitions, remain usable.
The following statement adds a new set of cities ('KOCHI', 'MANGALORE') to an existing partition list.
ALTER TABLE customers
   MODIFY PARTITION south_india
      ADD VALUES ('KOCHI', 'MANGALORE');
 

Modifying Partitions: Dropping Values

Use the MODIFY PARTITION ... DROP VALUES clause of the ALTER TABLE statement to remove literal values from the value list of an existing partition. The statement is always executed with validation, meaning that it checks to see if any rows exist in the partition that correspond to the set of values being dropped. If any such rows are found then Oracle returns an error message and the operation fails. When necessary, use a DELETE statement to delete corresponding rows from the table before attempting to drop values.
You cannot drop all literal values from the value list describing the partition. You must use the ALTER TABLE ... DROP PARTITION statement instead. 
The partition value list for any corresponding local index partition reflects the new value list, and any global index, or global or local index partitions, remain usable.
The statement below drops a set of cities (‘KOCHI' and 'MANGALORE') from an existing partition value list.
ALTER TABLE customers
   MODIFY PARTITION south_india
      DROP VALUES (‘KOCHI’,’MANGALORE’);


SPLITTING PARTITIONS

 
You can split a single partition into two partitions. For example to split the partition p5 of sales table into two partitions give the following command.
 
Alter table sales split partition p5 into 
  (Partition p6 values less than (1996),
   Partition p7 values less then (MAXVALUE));
 

TRUNCATING PARTITON

 
Truncating a partition will delete all rows from the partition. 
 
To truncate a partition give the following statement
 
Alter table sales truncate partition p5;
 

LISTING INFORMATION ABOUT PARTITION TABLES

 
To see how many partitioned tables are there in your schema give the following statement
 
Select * from user_part_tables;
 
To see on partition level partitioning information
 
Select * from user_tab_partitions;

Wednesday, March 28, 2012

how to fine find Oracle database performance

set serveroutput on
declare
cursor c1 is select version
from v$instance;
cursor c2 is
    select
          host_name
       ,  instance_name
       ,  to_char(sysdate, 'HH24:MI:SS DD-MON-YY') currtime
       ,  to_char(startup_time, 'HH24:MI:SS DD-MON-YY') starttime
     from v$instance;
cursor c4 is
select * from (SELECT count(*) cnt, substr(event,1,50) event
FROM v$session_wait
WHERE wait_time = 0
AND event NOT IN ('smon timer','pipe get','wakeup time manager','pmon timer','rdbms ipc message',
'SQL*Net message from client')
GROUP BY event
ORDER BY 1 DESC) where rownum <6;
cursor c5 is
select round(sum(value)/1048576) as sgasize from v$sga;
cursor c6 is select round(sum(bytes)/1048576) as dbsize
from v$datafile;
cursor c7 is select 'top physical i/o process' category, sid,
       username, total_user_io amt_used,
       round(100 * total_user_io/total_io,2) pct_used
from (select b.sid sid, nvl(b.username, p.name) username,
             sum(value) total_user_io
      from v$statname c, v$sesstat a,
           v$session b, v$bgprocess p
      where a.statistic# = c.statistic#
      and p.paddr (+) = b.paddr
      and b.sid = a.sid
      and c.name in ('physical reads', 'physical writes',
                     'physical reads direct',
                     'physical reads direct (lob)',
                     'physical writes direct',
                     'physical writes direct (lob)')
      and b.username not in ('SYS', 'SYSTEM', 'SYSMAN', 'DBSNMP')
      group by b.sid, nvl(b.username, p.name)
      order by 3 desc),
     (select sum(value) total_io
      from v$statname c, v$sesstat a
      where a.statistic# = c.statistic#
      and c.name in ('physical reads', 'physical writes',
                       'physical reads direct',
                       'physical reads direct (lob)',
                       'physical writes direct',
                       'physical writes direct (lob)'))
where rownum < 2
union all
select 'top logical i/o process', sid, username,
       total_user_io amt_used,
       round(100 * total_user_io/total_io,2) pct_used
from (select b.sid sid, nvl(b.username, p.name) username,
             sum(value) total_user_io
      from v$statname c, v$sesstat a,
           v$session b, v$bgprocess p
      where a.statistic# = c.statistic#
      and p.paddr (+) = b.paddr
      and b.sid = a.sid
      and c.name in ('consistent gets', 'db block gets')
      and b.username not in ('SYS', 'SYSTEM', 'SYSMAN', 'DBSNMP')
      group by b.sid, nvl(b.username, p.name)
      order by 3 desc),
     (select sum(value) total_io
      from v$statname c, v$sesstat a,
           v$session b, v$bgprocess p
      where a.statistic# = c.statistic#
      and p.paddr (+) = b.paddr
 and b.sid = a.sid
      and c.name in ('consistent gets', 'db block gets'))
where rownum < 2
union all
select 'top memory process', sid,
       username, total_user_mem,
       round(100 * total_user_mem/total_mem,2)
from (select b.sid sid, nvl(b.username, p.name) username,
             sum(value) total_user_mem
      from v$statname c, v$sesstat a,
           v$session b, v$bgprocess p
      where a.statistic# = c.statistic#
      and p.paddr (+) = b.paddr
      and b.sid = a.sid
      and c.name in ('session pga memory', 'session uga memory')
      and b.username not in ('SYS', 'SYSTEM', 'SYSMAN', 'DBSNMP')
      group by b.sid, nvl(b.username, p.name)
      order by 3 desc),
     (select sum(value) total_mem
      from v$statname c, v$sesstat a
      where a.statistic# = c.statistic#
      and c.name in ('session pga memory', 'session uga memory'))
where rownum < 2
union all
select 'top cpu process', sid, username,
       total_user_cpu,
       round(100 * total_user_cpu/greatest(total_cpu,1),2)
from (select b.sid sid, nvl(b.username, p.name) username,
             sum(value) total_user_cpu
      from v$statname c, v$sesstat a,
           v$session b, v$bgprocess p
      where a.statistic# = c.statistic#
      and p.paddr (+) = b.paddr
      and b.sid = a.sid
      and c.name = 'CPU used by this session'
      and b.username not in ('SYS', 'SYSTEM', 'SYSMAN', 'DBSNMP')
      group by b.sid, nvl(b.username, p.name)
      order by 3 desc),
     (select sum(value) total_cpu
      from v$statname c, v$sesstat a,
           v$session b, v$bgprocess p
      where a.statistic# = c.statistic#
      and p.paddr (+) = b.paddr
      and b.sid = a.sid
      and c.name = 'CPU used by this session')
where rownum < 2;


cursor c8 is select username, sum(VALUE/100) cpu_usage_sec
from v$session ss, v$sesstat se, v$statname sn
where se.statistic# = sn.statistic#
and name like '%CPU used by this session%'
and se.sid = ss.sid
and username is not null
and username not in ('SYS', 'SYSTEM', 'SYSMAN', 'DBSNMP')
group by username
order by 2 desc;
begin
dbms_output.put_line ('Database Version');
dbms_output.put_line ('-----------------');
for rec in c1
loop
dbms_output.put_line(rec.version);
end loop;
dbms_output.put_line( chr(13) );
dbms_output.put_line('Hostname');
dbms_output.put_line ('----------');
for rec in c2
loop
     dbms_output.put_line(rec.host_name);
end loop;
dbms_output.put_line( chr(13) );
dbms_output.put_line('SGA Size (MB)');
dbms_output.put_line ('-------------');
for rec in c5
loop
     dbms_output.put_line(rec.sgasize);
end loop;
dbms_output.put_line( chr(13) );
dbms_output.put_line('Database Size (MB)');
dbms_output.put_line ('-----------------');
for rec in c6
loop
     dbms_output.put_line(rec.dbsize);
end loop;
dbms_output.put_line( chr(13) );
dbms_output.put_line('Instance start-up time');
dbms_output.put_line ('-----------------------');
for rec in c2 loop
 dbms_output.put_line( rec.starttime );
  end loop;
dbms_output.put_line( chr(13) );
  for b in
    (select total, active, inactive, system, killed
    from
       (select count(*) total from v$session)
     , (select count(*) system from v$session where username is null)
     , (select count(*) active from v$session where status = 'ACTIVE' and username is not null)


     , (select count(*) inactive from v$session where status = 'INACTIVE')
     , (select count(*) killed from v$session where status = 'KILLED')) loop
dbms_output.put_line('Active Sessions');
dbms_output.put_line ('---------------');
dbms_output.put_line(b.total || ' sessions: ' || b.inactive || ' inactive,' || b.active || ' active, ' || b.system || ' system, ' || b.killed || ' killed ');
  end loop;
  dbms_output.put_line( chr(13) );
 dbms_output.put_line( 'Sessions Waiting' );
  dbms_output.put_line( chr(13) );
dbms_output.put_line('Count      Event Name');
dbms_output.put_line('-----      -----------------------------------------------------');
for rec in c4
loop
dbms_output.put_line(rec.cnt||'          '||rec.event);
end loop;
dbms_output.put_line( chr(13) );


dbms_output.put_line('-----      -----------------------------------------------------');


dbms_output.put_line('TOP Physical i/o, logical i/o, memory and CPU processes');
dbms_output.put_line ('---------------');
for rec in c7
loop
dbms_output.put_line (rec.category||': SID '||rec.sid||' User : '||rec.username||': Amount used : '||rec.amt_used||': Percent used: '||rec.pct_used);
end loop;


dbms_output.put_line('------------------------------------------------------------------');


dbms_output.put_line('TOP CPU users by usage');
dbms_output.put_line ('---------------');
for rec in c8
loop


dbms_output.put_line (rec.username||'--'||rec.cpu_usage_sec);
dbms_output.put_line ('---------------');
end loop;


end;

Monday, March 5, 2012

Steps to Upgrade 11.2.0.1 RAC to 11.2.0.2

Following files contain database software for 11.2.0.2.
p10098816_112020_Linux-x86-64_1of7.zip
p10098816_112020_Linux-x86-64_2of7.zip
Please note that this is full release , so if you are installing new software, you can directly install 11.2.0.2 without need of first installing 11.2.0.1 database.Unzip the software and start the runInstaller from the database directory.
cd $SW_HOME/database
./runInstaller
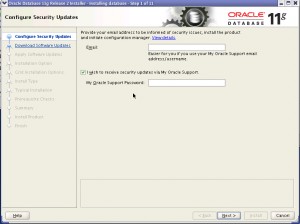
We will be presented with OUI screen asking for MOS credentials. Please note that we would be installing software into new ORACLE_HOME, which is a new feature called out of place upgrade.

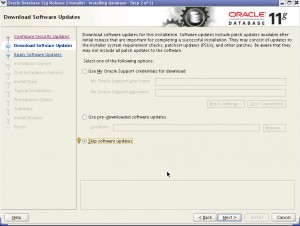
Next screen ask’s again for MOS credentials. This can be used to check if there are any patches which need’s to be applied before software can be upgraded. Since we have already applied the PSU2, we will choose skip Software updates

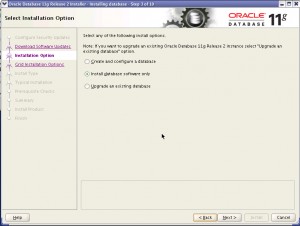
We are now presented with 3 options
a)Create and Configure database – installs software and creates a database using dbca
b)Install database software only – Only installs 11.2.0.2 software
c) Upgrade exisiting database – Installs software and launches dbua to upgrade database
We chose option b) i.e Install database software only

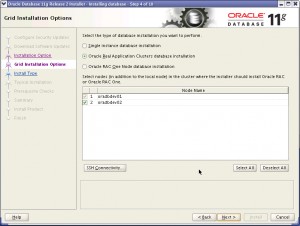
Next screen presents you with 3 options
a)Single Instance database installation
b)Oracle RAC Installation
c)Oracle RAC One Node database Installation
I will be discussing RAC one node in a future post. For our installation we are upgrading RAC database and require RAC software

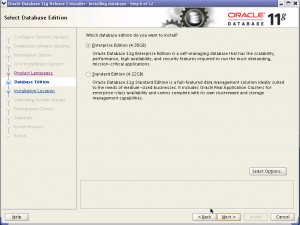
Next screen gives option to choose between Enterprise edition and Standard Edition

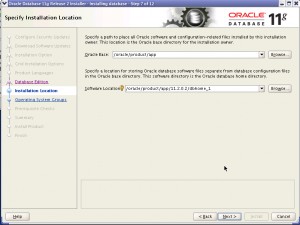
Next screen asks for database software installation directory. Unlike Grid infrastructure, where it is mandatory to install in new ORACLE_HOME, RAC database software can be installed in existing home. But we will be choosing Out of place upgrade i.e install in new home.

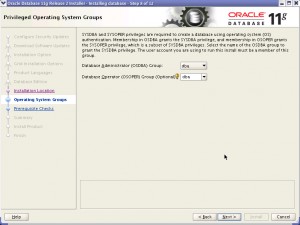
Choose the OSDBA and OSOPER group

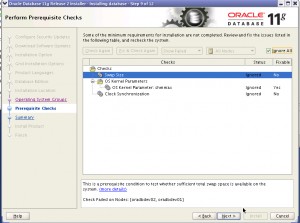
Next screen checks the pre-requisites. You can ask oracle to create fixup script. Refer to my earlier post for detail

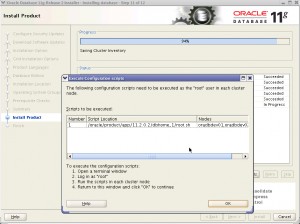
Finally we are prompted to run root.sh from both nodes

After you have run root.sh from both nodes, you can then use dbua to upgrade the database. Note that we have not yet brought down the database. This is great benefit of using out of place upgrade . Second benefit is that you are not touching the existing binaries,so you are not required to take backup of binaries and can can easily rollback the changes (if required). You can also continue using the old binaries for databases which you cannot get downtime and can upgrade them later.
Set the ORACLE_HOME and PATH to include 11.2.0.2 software location and start dbua. Take backup of database before you start upgrade process using dbua
$dbua
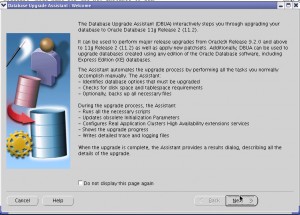
We are presented with welcome screen. Press next

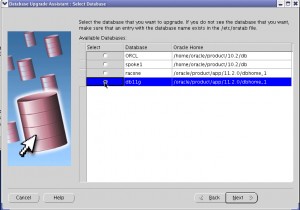
DBUA presents you with list of databases currently registered in /etc/oratab. We select db11g which we need to upgrade

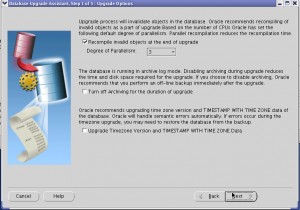
Next screen asks for following options
a) Option to recompile invalid objects and degree of parallelism for running utlrp.sql. We keep default value of 3
b) Option to disable archiving during upgrade
c)Upgrade the timezone file. We have not selected it now and will do upgrade manually

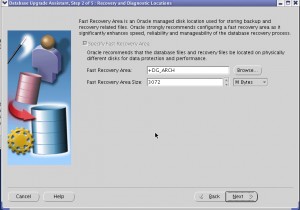
Next screen presents with option to select Fast Recovery area and size

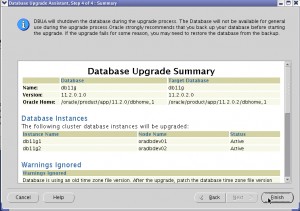
Next we will be presented with summary screen and asked to take backup of database. If you have not taken it till now, its good time to take backup. Also now database will be stopped and will be started from new oracle home.Please ensure that you have appropriate setting for JAVA_POOL_SIZE and SHARED_POOL_SIZE during upgrade or can use SGA_TARGET/MEMORY_TARGET to avoid ora-4031

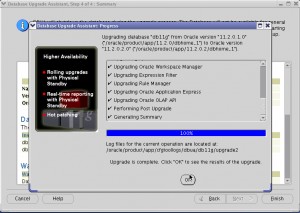
Following screen shows database upgrade progress screen.

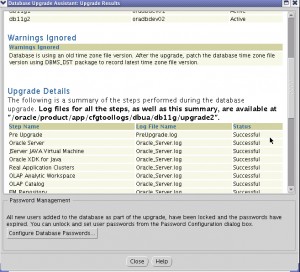
Once upgrade completes, it gives summary of upgrade process. As you can see it has warned for DST upgrade.

Oracle 11.2.0.2 contains version 14 file. Starting 11g you can have multiple database running out of single oracle home to have different timezone version files.
You can refer to Updating the RDBMS DST version in 11gR2 (11.2.0.1 and up) using DBMS_DST [ID 977512.1]
Giving summary of steps taken by us to upgrade from version 11 to version 14
---Check the current version of file ---
SQL> select version from V$TIMEZONE_FILE;

   VERSION
----------
 11

SQL> SELECT PROPERTY_NAME, SUBSTR(property_value, 1, 30) value
FROM DATABASE_PROPERTIES
WHERE PROPERTY_NAME LIKE 'DST_%'
ORDER BY PROPERTY_NAME;  2    3    4  

PROPERTY_NAME         VALUE
------------------------------ ------------------------------
DST_PRIMARY_TT_VERSION        11
DST_SECONDARY_TT_VERSION       0
DST_UPGRADE_STATE        NONE

---Confirm if $ORACLE_HOME/oracore/zoneinfo contains timezlrg_14.dat i.e version 14 file

--Prepare for upgrade
SQL> exec DBMS_DST.BEGIN_PREPARE(14);

PL/SQL procedure successfully completed.

--Confirm status

SQL> SELECT PROPERTY_NAME, SUBSTR(property_value, 1, 30) value
FROM DATABASE_PROPERTIES
WHERE PROPERTY_NAME LIKE 'DST_%'
ORDER BY PROPERTY_NAME;  2    3    4  

PROPERTY_NAME         VALUE
------------------------------ ------------------------------
DST_PRIMARY_TT_VERSION        11
DST_SECONDARY_TT_VERSION       14
DST_UPGRADE_STATE        PREPARE

---Re-running prepare statement will give below error.
SQL> exec DBMS_DST.BEGIN_PREPARE(14);
BEGIN DBMS_DST.BEGIN_PREPARE(14); END;

*
ERROR at line 1:
ORA-56920: a prepare or upgrade window or an on-demand or datapump-job loading of a secondary time zone data file is in
an active state
ORA-06512: at "SYS.DBMS_SYS_ERROR", line 79
ORA-06512: at "SYS.DBMS_DST", line 1340
ORA-06512: at line 1

-- truncate logging tables if they exist.

TRUNCATE TABLE SYS.DST$TRIGGER_TABLE;
TRUNCATE TABLE sys.dst$affected_tables;
TRUNCATE TABLE sys.dst$error_table;

-- log affected data

BEGIN
DBMS_DST.FIND_AFFECTED_TABLES
(affected_tables => 'sys.dst$affected_tables',
log_errors => TRUE,
log_errors_table => 'sys.dst$error_table');
END;
/
---Query table to check if any affected table
SQL> SQL> SELECT * FROM sys.dst$affected_tables;

no rows selected

SQL>
SQL> SELECT * FROM sys.dst$error_table;

no rows selected

-- End the prepare phase
SQL> EXEC DBMS_DST.END_PREPARE;
A prepare window has been successfully ended.

--Startup the database in upgrade mode. Ensure you have set cluster_database=false

SQL> EXEC DBMS_DST.BEGIN_UPGRADE(14);
An upgrade window has been successfully started.

PL/SQL procedure successfully completed.

-- To confirm whether it has been upgraded to version 14
SQL> SELECT PROPERTY_NAME, SUBSTR(property_value, 1, 30) value
FROM DATABASE_PROPERTIES
WHERE PROPERTY_NAME LIKE 'DST_%'
ORDER BY PROPERTY_NAME;  2    3    4  

PROPERTY_NAME         VALUE
------------------------------ ------------------------------
DST_PRIMARY_TT_VERSION        14
DST_SECONDARY_TT_VERSION       11
DST_UPGRADE_STATE        UPGRADE

--Restart the database after removing cluster_database
This completes the database upgrade process. I would recommend dbua to upgrade the database as  it takes care of copying the init.ora files,password file and also modified the OCR to point to new oracle home and upgraded srvctl version. Oracle Upgrade guide does not list any method documenting steps to be taken for srvctl. I referred following link i.e Oracle Database Upgrade documentation for the upgrade purpose
http://download.oracle.com/docs/cd/E11882_01/server.112/e17222/upgrade.htm#i1011981
In case you use manual method and use srvctl modify database to point to new oracle home, you will get errors like below
srvctl stop database -d test11g
PRCD-1027 : Failed to retrieve database test11g
PRCD-1229 : An attempt to access configuration of database test11g was rejected because its version 11.2.0.1.0 differs from the program version 11.2.0.2.0. Instead run the program from /oracle/product/app/11.2.0/dbhome_1.
You can use following command to upgrade the srvctl version
srvctl upgrade database -d test11g -o /oracle/product/app/11.2.0.2/dbhome_1
Happy Upgrading.

Enabling Archive Logs in a RAC Environment


  1. Enable archiving:
    SQL> alter database archivelog;
  2. Re-enable support for clustering by modifying the instance parameter cluster_database to TRUE from the current instance:
    SQL> alter system set cluster_database=true scope=spfile sid='racdb1';
  3. Shutdown the local instance:
    SQL> shutdown immediate
  4. Bring all instance back up using srvctl:
    $ srvctl start database -d racdb
  5. (Optional) Bring any services (i.e. TAF) back up using srvctl:
    $ srvctl start service -d racdb
  6. Login to the local instance and verify Archive Log Mode is enabled:
    $ sqlplus "/ as sysdba"
    SQL> archive log list
    Database log mode              Archive Mode
    Automatic archival             Enabled
    Archive destination            USE_DB_RECOVERY_FILE_DEST
    Oldest online log sequence     83
    Next log sequence to archive   84
    Current log sequence           84
After enabling Archive Log Mode, each instance in the RAC configuration can automatically archive redologs!

Thursday, March 1, 2012

Applying PSU Patch 11.2.0.1.2 To A Two Node RAC

Applying PSU Patch 11.2.0.1.2 To A Two Node RAC


NOTE : This article is aimed at showing the issues and resolution while applying the PSU patch 11.2.0.1.2 (9655006) to a specific environment and not generalized. Please refer the readme of the PSU patch for detailed procedure to apply PSU patch.
Video Demos are also uploaded to show you the errors and successfull installation of the PSU to 2 node RAC.
1. Record Pre Patch Information.
2. OPatch Utility Information.
3. OCM Configuration.
4. Validation of Oracle Inventory.
5. One-off Patch Conflict Detection and Resolution.
6. Download and Unzip the PSU Patch 9655006
7. Patching GI Home
8. Patching RAC Database Homes
9. Loading Modified SQL Files into the Database.
10. Patch Successful Verification Steps.
11. Issues & Resolutions.

1. Record Pre Patch Information.

  1. Login to each node in RAC as grid user and execute the following command.
    $GRID_ORACLE_HOME/OPatch/opatch lsinventory

    $GRID_ORACLE_HOME/OPatch/opatch lsinventory -bugs_fixed | grep -i ‘GI PSU’
  2. Login to each node in RAC as oracle user and execute the following command.
    $ORACLE_HOME/OPatch/opatch lsinventory

    $ORACLE_HOME/OPatch/opatch lsinventory -bugs_fixed | grep -i ‘DATABASE PSU’
  3. Connect to each instance and record registry information.
    SQL> select comp_name,version,status from dba_registry;

2. OPatch Utility Information.

$ORACLE_HOME/OPatch/opatch version -h /u01/home/oracle/product/11.2.0/db_1
$GRID_ORACLE_HOME/OPatch/opatch version -h /u01/home/11.2.0/grid

3. OCM Configuration.

Create ocm response file using the following command and provide appropriate values for the prompts.
$GRID_ORACLE_HOME/OPatch/ocm/bin/emocmrsp
Verify the created file using,
$GRID_ORACLE_HOME/OPatch/ocm/bin/emocmrsp –verbose ocm.rsp
NOTE: The Opatch utility will prompt for your OCM (Oracle Configuration Manager) response file when it is run. Without which we cant proceed further.

4. Validation of Oracle Inventory.

$GRID_ORACLE_HOME/OPatch/opatch lsinventory -detail -oh /u01/home/11.2.0/grid
$ORACLE_HOME/OPatch/opatch lsinventory -detail –oh /u01/home/oracle/product/11.2.0/db_1

5. One-off Patch Conflict Detection and Resolution.

NA

6. Download and Unzip the PSU Patch 9655006

$cd /u01/home/oracle/product/11.2.0/db_1/patches/psupatch
$unzip p9655006_11201_Linux.zip
$chmow -R 777 *

7. Patching GI Home

NOTE: If the GI home is shared, then make sure to shut down the GI stack on all remote nodes. Keep the GI stack up and running on the local node.
NOTE: If the GI home is not shared, then make sure the GI stack is running on all nodes in the cluster.
Our Grid Home is not shared, So don’t shutdown any services.
$su – ( Login to root user )
#/u01/home/11.2.0/grid/OPatch/opatch auto /u01/home/oracle/product/11.2.0/db_1/patches/psupatch -oh /u01/home/11.2.0/grid
Monitor the logfile created in $GRID_ORACLE_HOME/cfgtoollogs/
Execute the above opatch command on each RAC node as root user.
** Please refer the Issue & Resolutions secion in the same document for any issues.

8. Patching RAC Database Homes

All Oracle processes and applications (such as emconsole and emagent) that are running from the database home and that are not managed by clusterware should be stopped manually before you apply the patch using the opatch auto command.
$su – ( Login to root user )
# /u01/home/oracle/product/11.2.0/db_1/OPatch/opatch auto /u01/home/oracle/product/11.2.0/db_1/patches/psupatch -oh /u01/home/oracle/product/11.2.0/db_1
Monitor the logfile created in $ORACLE_HOME/cfgtoollogs/
Execute the above opatch command on each RAC node as root user.
** Please refer the Issue & Resolutions secion in the same document for any issues.

9. Loading Modified SQL Files into the Database.

For each database instance running on the Oracle home being patched, connect to the database using SQL*Plus. Connect as SYSDBA and run the catbundle.sql script as follows:
cd $ORACLE_HOME/rdbms/admin
sqlplus /nolog
SQL> CONNECT / AS SYSDBA
SQL> @catbundle.sql psu apply
SQL> QUIT
Check the log files in $ORACLE_HOME/cfgtoollogs/catbundle for any errors

10. Patch Successful Verification Steps.

  1. Login to each node in RAC as grid user and execute the following command.
    $GRID_ORACLE_HOME/OPatch/opatch lsinventory -bugs_fixed | grep -i ‘GI PSU’
  2. Login to each node in RAC as oracle user and execute the following command.
    $ORACLE_HOME/OPatch/opatch lsinventory -bugs_fixed | grep -i ‘DATABASE PSU’
  3. Connect to each instance and record registry information.
    SQL> select comp_name,version,status from dba_registry;
    SQL> select * from dba_registry_history;


11. Issues & Resolutions.

Issue 1:

When applying the patch, you may get the following error

The opatch minimum version check for patch /u01/home/oracle/product/11.2.0/db_1/patches/9655006/custom failed for /u01/home/11.2.0/grid
The opatch minimum version check for patch /u01/home/oracle/product/11.2.0/db_1/patches/9655006/etc failed for /u01/home/11.2.0/grid
The opatch minimum version check for patch /u01/home/oracle/product/11.2.0/db_1/patches/9655006/files failed for /u01/home/11.2.0/grid
Opatch version check failed for oracle home /u01/home/11.2.0/grid
Opatch version check failed
update the opatch version for the failed homes and retry
Solution:

Ref Note : 1308858.1

We need to provide the Patch unzipped base directory, not the directory including patch number

Ex : /u01/home/oracle/product/11.2.0/db_1/patches/psupatch/9655006 ( Wrong )

/u01/home/oracle/product/11.2.0/db_1/patches/psupatch ( correct )

Issue 2

Patch may exit with the following error messages

Unable to determine if /u01/home/11.2.0/grid is shared oracle home
Enter ‘yes’ if this is not a shared home or if the prerequiste actions are performed to patch this shared home (yes/no):yes
You must kill crs processes or reboot the system to properly
cleanup the processes started by Oracle clusterware
The Oracle Clusterware stack failed to stop.
You should stop the stack with ‘crsctl stop crs’ and rerun the command
The opatch Applicable check failed for /u01/home/11.2.0/grid. The patch is not applicable for /u01/home/11.2.0/grid
patch ././9655006 apply failed for home /u01/home/11.2.0/grid
Solution :

This error may be specific to this environment though want to specify it here. This error is due to the reason that there are some cluster resources available referring the 10g database installed earlier. Delete those resources from clusterware.

# crsctl delete resource -f
Issue 3 :

PSU patch for GRID home on node 2 failed with the following error

Unable to determine if /u01/home/11.2.0/grid is shared oracle home
Enter ‘yes’ if this is not a shared home or if the prerequiste actions are performed to patch this shared home (yes/no):yes
Successfully unlock /u01/home/11.2.0/grid
patch ././9655006 apply failed for home /u01/home/11.2.0/grid
Verified the detailed log file locate in /u01/home/11.2.0/grid/cfgtoollogs/ and found the permission issue on some files.

The following actions have failed:
Copy failed from ‘/u01/home/oracle/product/11.2.0/db_1/patches/psupatch/9655006/files/bin/crsctl.bin’ to ‘/u01/home/11.2.0/grid/bin/crsctl.bin’…
Copy failed from ‘/u01/home/oracle/product/11.2.0/db_1/patches/psupatch/9655006/files/bin/oifcfg.bin’ to ‘/u01/home/11.2.0/grid/bin/oifcfg.bin’…
Solution:

Give 777 permission to these files crsctl.bin and oifcfg.bin

Issue 4 :

PSU Patch for RDBMS Home on node 1 failed with the following error

Unable to determine if /u01/home/oracle/product/11.2.0/db_1 is shared oracle home
Enter ‘yes’ if this is not a shared home or if the prerequiste actions are performed to patch this shared home (yes/no):yes
patch ././9655006/custom/server/9655006 apply failed for home /u01/home/oracle/product/11.2.0/db_1
Verified the detailed log file locate in /u01/home/oracle/product/11.2.0/db_1/cfgtoollogs and found the platform issue.

Running prerequisite checks…
Prerequisite check “CheckPatchApplicableOnCurrentPlatform” failed.
The details are:
Patch ( 9655006 ) is not applicable on current platform.
Platform ID needed is : 46
Platform IDs supported by patch are: 226
UtilSession failed: Prerequisite check “CheckPatchApplicableOnCurrentPlatform” failed.
OPatch failed with error code 73
Solution:

export OPATCH_PLATFORM_ID=226 and execute the psu patch command again.

Issue 5:

While applying Grid Infrastructure PSU (patch 9343627) to $GRID_HOME, opatch prerequisite check CheckSystemSpace failed:
Running prerequisite checks…
 Prerequisite check “CheckSystemSpace” failed.
 The details are:
 Required amount of space(4373569440) is not available.
 UtilSession failed: Prerequisite check “CheckSystemSpace” failed.

 OPatch failed with error code 73
Solution:
Follow the note ID 1088455.1 and make sure you have enough space on disk in GRID HOME mount point.
Reference NOTE IDs : 1082394.1 , 1308858.1 , 1169036.1 , 1290354.1, 1088455.1 and 1210964.1